Monday, October 4, 2010
Friday, October 1, 2010
Friday, September 17, 2010
Production Photos (After the finished film!)
Hello! I am writing from South Carolina, a freshly graduated Animation BFA from Savannah College of Art and Design!
Saturday, August 21, 2010
Saturday, July 31, 2010
Animation Magazine Pitch Poster

Animation Magazine recently held their annual Pitch Poster contest. My pitch poster was drawn by Cassandra Poulson, as one of the preliminary sketches of Cameron, one of the gypsies. http://www.animationmagazine.net/pitch_party_2010_vote.html Unfortunately, I had no idea that voting had begun, so I didn't get to post a link! Whoops, that's alright :) Congratulations to the winners!
Monday, July 26, 2010
Saturday, July 17, 2010
Boiko's Armature, a boo boo and T-nuts
 Here's Boiko's armature. It's very heavy.. I'll have to do something about that.
 Well, whoops. I was working really late at night and I drove a brass tube into Dalia's neck before I put her head on. And then I realized she had no neck mobility. That was a fun fix. Not!
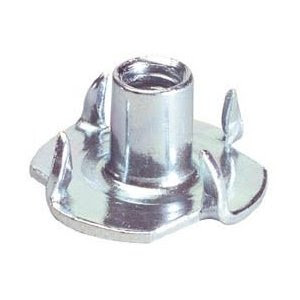
 T- nuts are way cooler than making tie-downs with propoxy. The "teeth" can fit right into the wires and then after you glue it in, Voila! Insta-tiedown-secureness!
Sunday, May 16, 2010
Band of Gypsies Understructures- Dalia and Cameron
Thursday, April 22, 2010
Monday, April 12, 2010
Thursday, April 8, 2010
Making a Silicone Mold
Instructions on how to make a silicone mold (for eyes and body blocks) for Stop Motion
Part I
Secure the object you want to make a mold for!
You can make a mold from almost anything, as long as it is a solid object. For eyes, you can find spherical objects such as different size marbles. Body blocks are generally made from baked sculpey objects.
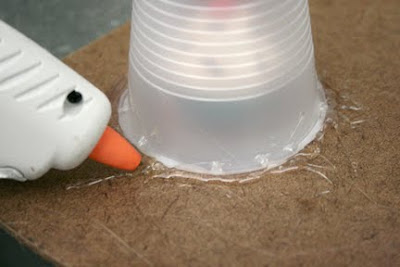
Before you can pour the silicone onto your object, making a rubbery mold suitable for pouring resin into, you need to secure your object to a piece of masonite or thick cardboard. You will do this by hot gluing it down. Make borders out of foam core, hot gluing them as well. Make sure to seal up EVERY SEAM, including the seam from the foam to the masonite, and all of the edges. Silicone is very dense and will try to bust out the sides and bottom of your foam core (or in my case, plastic cup) walls, so take your time to make sure there are zero gaps!
Since I used a cup, I had to cut the top of it off, so that we would be able to pour the silicone into it.
Next, Mixing the silicone!
Part II
1. Take two wax disposable cups and double them up for extra thickness and sturdiness.
2. Put the cups on a digital scale and zero out the scale, so that the scale reads "0.0grams"
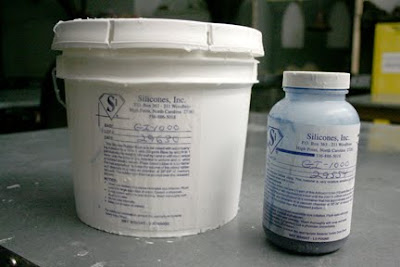
3. Pour your white silicone base (GI-1000) from Silicones, Inc into your double cups. Make sure to close up the base container so that no activator gets in during the next step! It will contaminate the whole batch!
4. Write down how many grams the scale reads, and zero out the scale again. I had 100 grams of base in the cup.
5. Add the blue activator to the base. Do not add any more or less than ONE TENTH of the weight of the base you already poured. For example, I poured 100 grams of base into the cup, so I know that I will need 10 grams of blue activator.
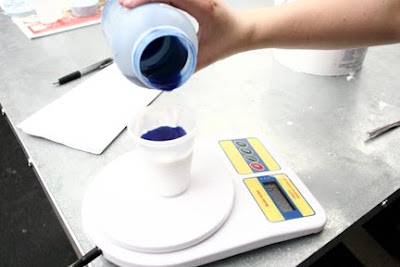
6. Stir the base and activator together until you have one solid color. If it still looks marbley, keep stirring, you are not done. You can smack the cup down onto your table to try and get some of the bubbles out.
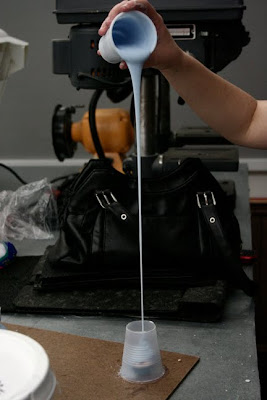
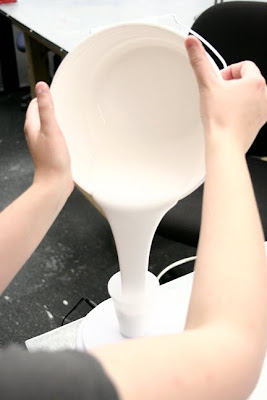
7. Pour your blue silicone mixture onto the object you wish to make a mold of. The higher you can pour, the better! Everyone will be so impressed with you for your mad skills!
Actually, that's a lie. The reason why you pour from up high is so the silicone stretches out, forcing your bubbles to pop :) Also, this would be a great time to be glad that all of your gaps are sealed up, because the super dense silicone will be pushing on the edges of your structure.
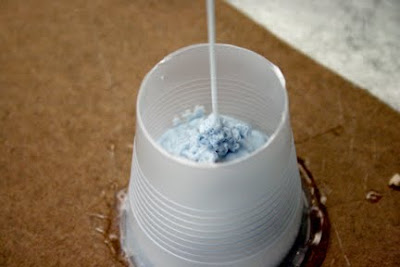
8. If the silicone is not coming out very well, you can use a popsicle stick to get the rest out. Put your mold into a safe place, where it won't be disturbed for at least 24 hours.
9. After 24 hours, you can break the cup or foam core off and pull your object out of the silicone.
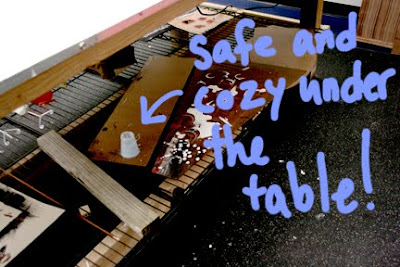 Now you have a hollow mold ready for resin!
Part I
Secure the object you want to make a mold for!
You can make a mold from almost anything, as long as it is a solid object. For eyes, you can find spherical objects such as different size marbles. Body blocks are generally made from baked sculpey objects.
Before you can pour the silicone onto your object, making a rubbery mold suitable for pouring resin into, you need to secure your object to a piece of masonite or thick cardboard. You will do this by hot gluing it down. Make borders out of foam core, hot gluing them as well. Make sure to seal up EVERY SEAM, including the seam from the foam to the masonite, and all of the edges. Silicone is very dense and will try to bust out the sides and bottom of your foam core (or in my case, plastic cup) walls, so take your time to make sure there are zero gaps!
Since I used a cup, I had to cut the top of it off, so that we would be able to pour the silicone into it.
Next, Mixing the silicone!

Part II
1. Take two wax disposable cups and double them up for extra thickness and sturdiness.
2. Put the cups on a digital scale and zero out the scale, so that the scale reads "0.0grams"
3. Pour your white silicone base (GI-1000) from Silicones, Inc into your double cups. Make sure to close up the base container so that no activator gets in during the next step! It will contaminate the whole batch!
4. Write down how many grams the scale reads, and zero out the scale again. I had 100 grams of base in the cup.
5. Add the blue activator to the base. Do not add any more or less than ONE TENTH of the weight of the base you already poured. For example, I poured 100 grams of base into the cup, so I know that I will need 10 grams of blue activator.

6. Stir the base and activator together until you have one solid color. If it still looks marbley, keep stirring, you are not done. You can smack the cup down onto your table to try and get some of the bubbles out.


7. Pour your blue silicone mixture onto the object you wish to make a mold of. The higher you can pour, the better! Everyone will be so impressed with you for your mad skills!
Actually, that's a lie. The reason why you pour from up high is so the silicone stretches out, forcing your bubbles to pop :) Also, this would be a great time to be glad that all of your gaps are sealed up, because the super dense silicone will be pushing on the edges of your structure.
8. If the silicone is not coming out very well, you can use a popsicle stick to get the rest out. Put your mold into a safe place, where it won't be disturbed for at least 24 hours.
9. After 24 hours, you can break the cup or foam core off and pull your object out of the silicone.
 Now you have a hollow mold ready for resin!
Wednesday, April 7, 2010
Making Resin Eyes with your Silicone Mold- tutorial
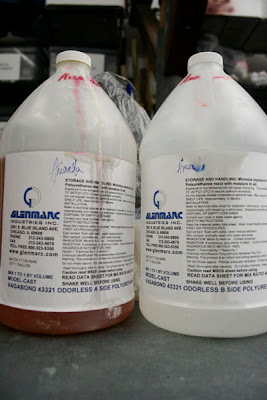
1. Pour equal amounts of Side A and Side B of GlenMarc Model-Cast (white) 43321 into plastic cups.
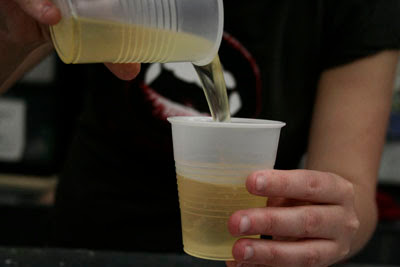
2. Mix them back and forth- you will begin to feel it get warm.
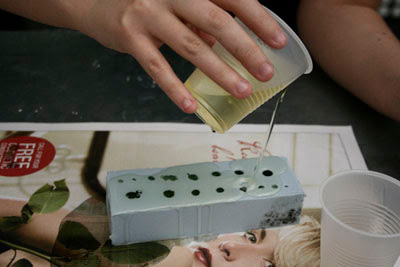
3.Pour the resin into the silicone mold. Put paper underneath so you don't make a mess!
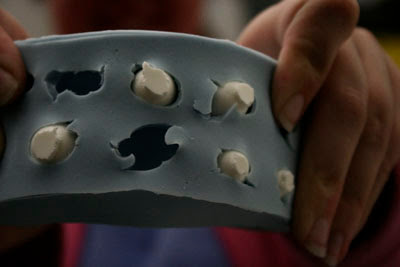
 Wait 20 minutes for the resin to solidify. Then pop the pieces out of the mold and sand them until they are smooth all the way around.
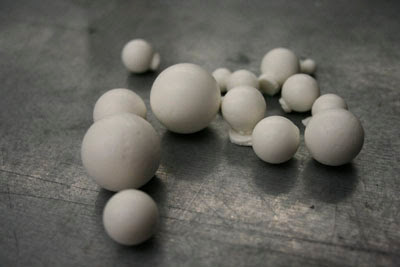

2. Mix them back and forth- you will begin to feel it get warm.

3.Pour the resin into the silicone mold. Put paper underneath so you don't make a mess!
 Wait 20 minutes for the resin to solidify. Then pop the pieces out of the mold and sand them until they are smooth all the way around.

Monday, April 5, 2010
Mold Making for Gypsy Characters
Here's a link about making Van Aken face molds for our characters- It will be very helpful for when we need to get the characters faces back into a neutral position after animating them. I'l use the step by step gromit mold tutorial, and show the process on this blog.
Tuesday, March 23, 2010
In need of a Production Designer!
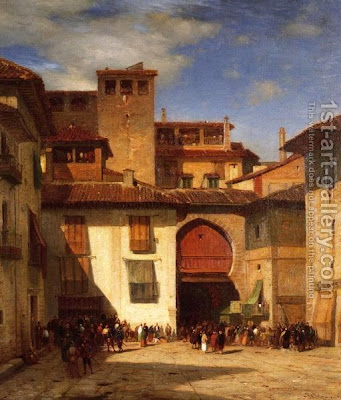 * If you are a production designer interested in helping me create stop motion- sized (roughly 1/6 scale) spanish environment with an architectural style similar to this, please email me at gypsyfilm@gmail.com. I look forward to hearing from you!*
Labels:
Environment,
Look Development,
Reference Images
Monday, March 1, 2010
Thursday, February 18, 2010
Wednesday, February 17, 2010
Story Notes/ Suggestions
Some notes from Nick Allred on the story:
Opening shot:
Another possible opening shot could be Cam tightening his instrument, adjusting his accordian.. This would be before the track starts, to ease into the story and also because at this point he's sitting. The characters are making music because they are strongly motivated to- they would probably not be sitting for the entire song. Also, if they stand, it adds to the action/tenseness of the quick cuts that will be used. The characters are not bored. Sitting lowers activity....
Would Cameron be sitting- if he's doing what he thinks he's made to do? Probably not.
How to introduce Boiko:
Boiko could come from a doorway somewhere, maybe a curtain draped archway or something, pulling a big box behind him. That is when he hears the thunder and turns around looking worried.
First raindrops:
We need to be able to see the first raindrops very clearly when they fall. Where do they hit and how do they work in the composition? Maybe the rain could hit a character on the head.
Boiko's actions:
Boiko is playing a brass instrument. But what about his body language and acting is telling us that he's nervous about the rainstorm? He suggested that Boiko could be inching towards shelter under an awning in the background
Cameron's actions:
Should Cameron be dancing around the middle of the song and before Dalia comes out? He's enjoying what he's doing...
Dalia's entrance:
How does Dalia come in? Does she stand there and look at the scene before she comes in, or does she run up to Cam, nearly crashing into him.
Now would be the part for the spinny set tricks. (See Tais toi Mon Coeur- very last shots)
A cat!:
Cats are neat! After the rain starts(and while they are appreciating what they just did) , maybe a cat jumps down and Dalia bends down to pet it. It's a scraggily wet gypsy cat of course.
Character faces-
We were talking about the porous (blistery looking) foam skin textures that most SCAD stop motion films have. Perhaps I should consider asking Andy or Nate or Janelle to model the faces in Maya and then rapid prototype replacement faces. I don't think we'd need a whole lot.....
Layout:
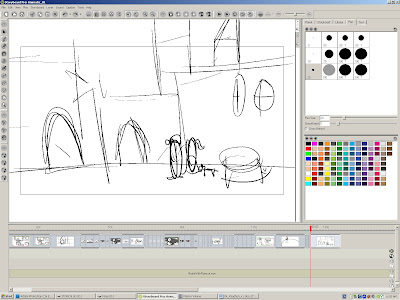 He scribbled out an idea for the last shot- it's completely different than the layout I was thinking of. (which is good because now we're bouncing new ideas around) I am posting it out of silliness and not wanting to lose it in all of my yucky file disorganization in my Concept class folder.
Monday, February 15, 2010
Animation Inspiration
Is this kind of smoothness (in animation and in the characters' skin textures) possible in Senior Thesis animation? Or is it only the product of funds and research from studios buying expensive armatures and better skin molds? I am hoping to have this quality (or as close to it as possible)of animation, textures, sets and clothing.
Check out the environment when they're in the street. Specifically the second clip at the 1 minute mark.
These sets are really cool, and so is the idea.. but I'm not fond of the puppets. at. all...
How did they get such smooth camera movements? Does anybody know??!!
This deserves to be looked at.. if only for the animation. It has nothing to do with gypsyfilm.
This is well done- the character animation is very good.
Wednesday, February 3, 2010
Referencing Jewels!
Great accordian reference!
Attitude reference! See 00:43, the bearded guy
More reference of their timing and attitudes-
-look at how they feed off of each other starting at 1:20
-also, around 1:39 watch the trumpet player breathing, he is pushing all of his air into it and his entire body has to recover when he takes in air.
2:09- check out his change of expression, very nice
With this next one-see 0:47. These references are great these clips that (1. The songs directly match the one we are using- expressions before a chorus or a big intake of air are consistent, and (2. Getting movement ideas from these shows can help us from being cliche. Their movements are very spur of the moment and unplanned. Whether or not they are perfect notes on stage, their attitudes are of performers, not storyboarded and pre-planned animated "cariacatures"- which are often so stereotyped or exaggerated that they lack a thought process.
This is interesting:
And another:
Lastly, this one has nothing to do with reference, it's just a really great cover of Mount Wroclai:
Tuesday, February 2, 2010
On making music...
"Mostly, no matter how inadequate my playing, the music is all that matters: I am outside time, outside self, in play, in joy. When we can play with the unself-conscious concentration of a child, this is: art: prayer: love."
- Madeleine L'Engle, A Circle of Quiet
- Madeleine L'Engle, A Circle of Quiet
Sunday, January 31, 2010
Production Challenges
After deciding to have this film made in stop-motion, I have thought of some things that will present a challenge:
1. Rain in stop motion? Is this possible? Hot glue gun?- Probably not the greatest solution. Fluid Effects in Maya or Houdini? Can we find a Visual Effects person who might be able to help us with this?
2. Real set vs. 3d set- how much of each?
3. Cloud/sky/lightning? How?
4. Is a 360 degree turn possible with stop motion? Are ANY camera moves possible? I would be devastated if we discovered that we were limited to still camera shots. Remember this shot from Coraline? Look how dynamic it is. I would love to incorporate a 360 at the end when the drops are falling more and more quickly and the tension is rising.
Friday, January 29, 2010
Updates!
As week 5 of Concept for Animation approaches, I have two things to announce!
1. I will be doing tests in hopes of having Band of Gypsies be a stop-motion short. If things go well (or if they don't and we keep trying until they do) we will have a minimal set (perhaps a little more than a porch and luggage for the gypsies to sit on) and a 3d, Maya, environment extending into our 'deep space' area.
2. We now have a producer! His name is Nick Reichard- a film and television major who is also a talented stop-motion animator. He will be the "man with the plan", keeping track of production deadlines, scheduling shoots with animators and co-running the meetings with me. (Among other things that have yet to surface!)
I am very excited to be continuing this project in the stop-motion medium. Next on the list of things to do are finishing character designs, storyboarding, and a finishing up with an animatic by the end of the quarter! I'll keep updating as things progress- I'm learning about armatures at the moment in Professor Miles' Stop Motion 2 class, and I can't wait to put that into use with our very own gypsy characters!
Subscribe to:
Comments (Atom)


