
Part I
Secure the object you want to make a mold for!
You can make a mold from almost anything, as long as it is a solid object. For eyes, you can find spherical objects such as different size marbles. Body blocks are generally made from baked sculpey objects.
Before you can pour the silicone onto your object, making a rubbery mold suitable for pouring resin into, you need to secure your object to a piece of masonite or thick cardboard. You will do this by hot gluing it down. Make borders out of foam core, hot gluing them as well. Make sure to seal up EVERY SEAM, including the seam from the foam to the masonite, and all of the edges. Silicone is very dense and will try to bust out the sides and bottom of your foam core (or in my case, plastic cup) walls, so take your time to make sure there are zero gaps!
Since I used a cup, I had to cut the top of it off, so that we would be able to pour the silicone into it.
Next, Mixing the silicone!

Part II
1. Take two wax disposable cups and double them up for extra thickness and sturdiness.
2. Put the cups on a digital scale and zero out the scale, so that the scale reads "0.0grams"
3. Pour your white silicone base (GI-1000) from Silicones, Inc into your double cups. Make sure to close up the base container so that no activator gets in during the next step! It will contaminate the whole batch!


4. Write down how many grams the scale reads, and zero out the scale again. I had 100 grams of base in the cup.
5. Add the blue activator to the base. Do not add any more or less than ONE TENTH of the weight of the base you already poured. For example, I poured 100 grams of base into the cup, so I know that I will need 10 grams of blue activator.

6. Stir the base and activator together until you have one solid color. If it still looks marbley, keep stirring, you are not done. You can smack the cup down onto your table to try and get some of the bubbles out.

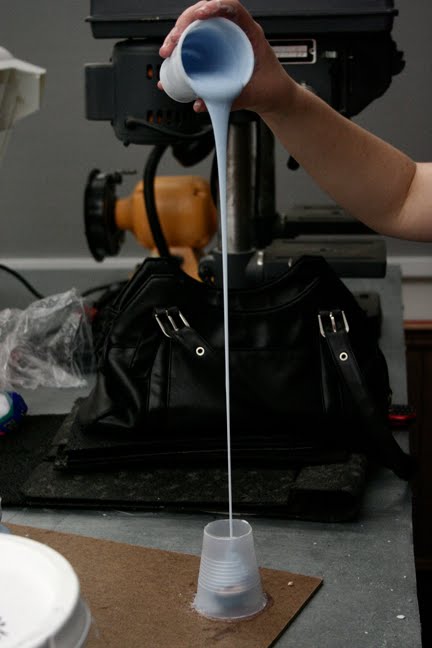
7. Pour your blue silicone mixture onto the object you wish to make a mold of. The higher you can pour, the better! Everyone will be so impressed with you for your mad skills!
Actually, that's a lie. The reason why you pour from up high is so the silicone stretches out, forcing your bubbles to pop :) Also, this would be a great time to be glad that all of your gaps are sealed up, because the super dense silicone will be pushing on the edges of your structure.

8. If the silicone is not coming out very well, you can use a popsicle stick to get the rest out. Put your mold into a safe place, where it won't be disturbed for at least 24 hours.
9. After 24 hours, you can break the cup or foam core off and pull your object out of the silicone.
 Now you have a hollow mold ready for resin!
No comments:
Post a Comment